Light Painting Photography: A Beginner's Guide
Light painting is a fun, simple night-time photography technique that can produce stunning results for beginner and advanced photographers alike.
Using a few key tools, you can easily experiment with light painting inside a dark room at night, or during the evening outdoors. Let’s get started!
What you’ll need for light painting photos:
- A DSLR or mirrorless camera, or smartphone (You can also light paint with an analog camera, but you can’t immediately gauge the success of your results! We recommend trying with digital first, then experimenting with film). If you are using a smartphone, you will have to download a long exposure app before getting started (more on this below).
- A light source. This can be a flashlight, glow sticks, an LED light, a headlamp, anything that produces a beam of light. Bonus points for different colors!
- A tripod, or a sturdy elevated surface such as a desk or chair
- Remote shutter release (optional)
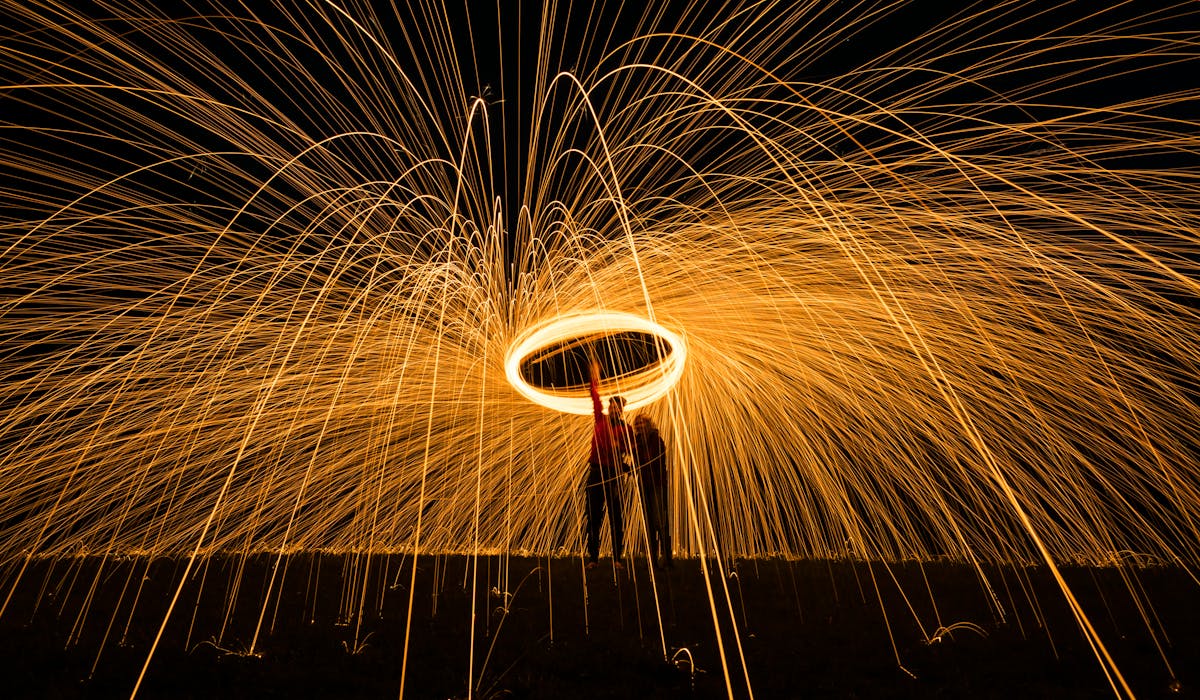
Bring a friend along to help you capture light painting images like this one.
Photo by Pixabay · View Photo

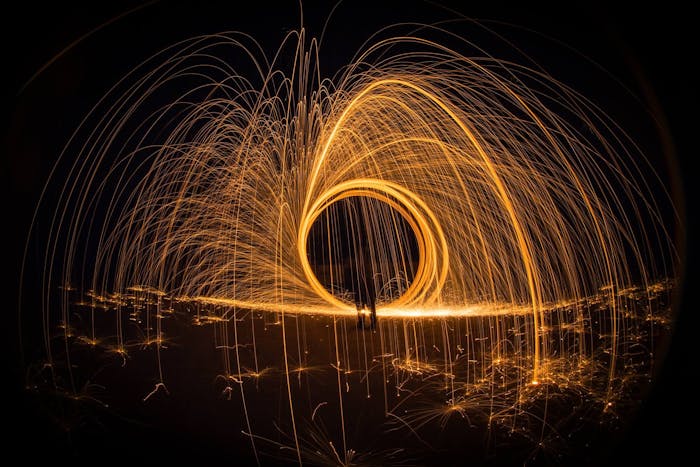
Two friends are even better than one for creative compositions.
Photo by Rudy Kirchner · View Photo
Light painting with a DSLR or mirrorless camera:
Use a tripod for maximum stability and control, or stabilize your camera on an elevated surface. For example, place your camera on a dresser, or on top of a stack of books, or on a chair, or a car if you’re outdoors.
- Turn on your light source in order to set camera settings.
- Set your camera to “M” for manual.
- Get the ISO to a low level. If you are looking to eliminate all ambient light, set the ISO to 100. For creative use of ambient light, try somewhere between 200 and 400.
- Set your aperture to a high number with a large depth of field, such as f/16 or f/22.
- Set your shutter speed between 10’’ and 30’’ ( “ represents seconds). Alternatively, use “bulb” mode and a remote shutter release to fully control how long the shutter is open.
Determine your focal point before getting started. It’s helpful to do this in ‘live mode’ on an LCD screen if possible, by zooming in and establishing focal points. Then zoom out and switch your lens and body to manual focus, so your camera isn’t searching for a focal point while the light source moves during your shoot.
Play with the white balance as you experiment. Depending on the temperature of your light source, you may want to alter it. For a white or blue light, try “incandescent” or “fluorescent.” For a yellow, orange light source, try “tungsten.” If you are measuring in degrees Kelvin, try 3400 K for a warm light source, and 4500 to 5000 for a cooler, white light source.
If you have one, try using a remote shutter release (check out this helpful article that breaks down your options into best reviews, budget buy, and more!) to give yourself maximum freedom as you light paint.
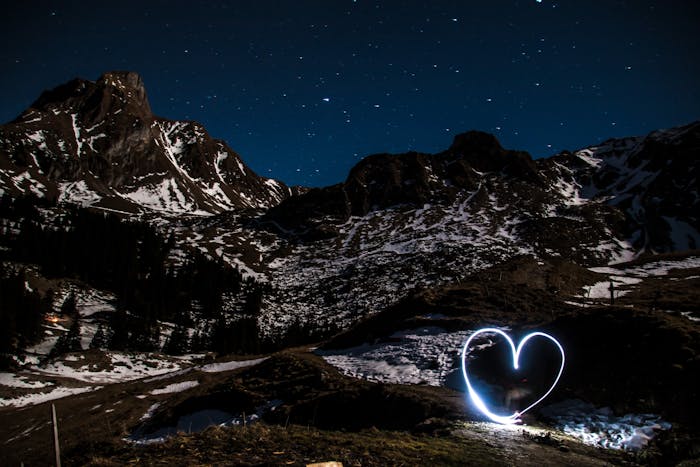
Try drawing a simple shape, like a heart, for your first light painting shot.
Photo by Pixabay · View Photo
Light painting with a smartphone:
First, download a long exposure app. Slow Shutter Cam has the best overall reviews of any long exposure iPhone app, and can be bought for USD$1.99 in the App Store. You can manually input both the ISO and the shutter speed for a controlled result, see live previews of images in real time, and work in three different capture modes.
Free app options include Slow Shutter Insta and LongExpo, both of which offer special shooting modes and manual control of shutter speed.
Trace the outlines of a scene for fascinating results.
Photo by Luis Quintero · View Photo
Using an Android device? Try ProCam X - Lite, which allows you to choose your shutter speed and play with interval shooting! Camera FV-5 Lite has the ability to control your shutter on the free version, but the highest resolution photos come with its premium option, which costs USD$3.
Use a phone tripod (this article has some helpful reviews if you are looking to purchase one), or stabilize your phone with a solid object on a raised surface. For example, prop your phone on a dresser or chair with a book behind it.
Set the focus by manually pressing on a subject in your foreground, with the light source engaged to establish focus. Set your shutter speed manually between 10’’ and 30’’. Use the in-app self timer to start your exposure, so your movement to press “start” doesn’t shake the phone.
Light painting techniques:
Once the shutter is open, start painting! The space in front of your camera’s lens is your canvas. There’s so much room for creativity with this technique, so make sure to try a combination of approaches.
Wear dark clothing when you (or your photo subject) go in front of your camera, so that only your light source appears.
Try writing letters, but keep in mind that what you write appears backwards in your photo! You can always fix this by flipping your photo in post production, or you can try painting letters backwards.
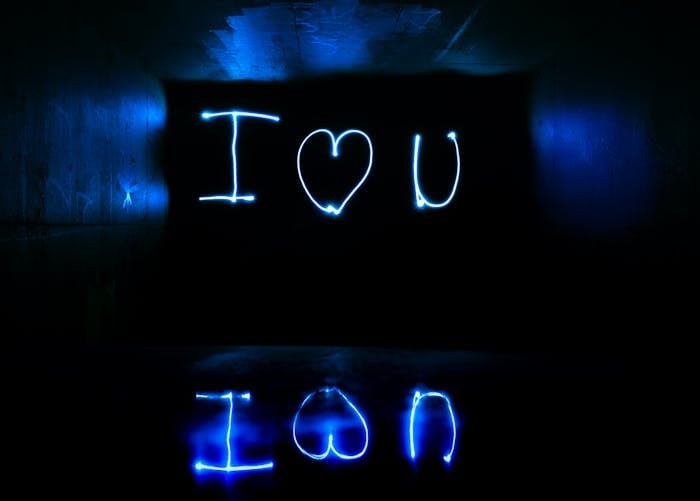
Writing a message is a fun light painting idea.
Photo by Bo Stevens · View Photo
Paint a more complicated artistic scene using the light source. Try drawing a figure, a flower, even a landscape!
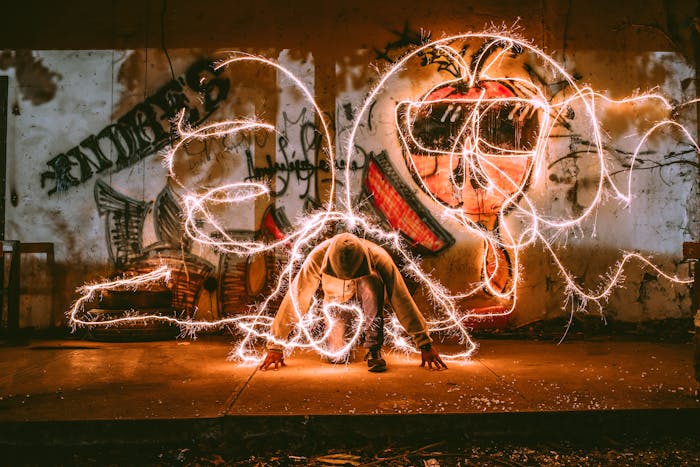
Use an object or a human subject to trace or paint on—this is also known as “light graffiti” and can be super creative! Remember: When your subject or object stays perfectly still, they will remain in focus. If they move even slightly, they will appear blurry in the photograph. Get behind them and paint at will.
For some inspiration, check out this light painting portrait tutorial, or head to Pinterest and Instagram for examples.
Make double, triple, quadruple exposures of yourself in the same photo! Go to one section of your frame and use your light source to highlight yourself. Then turn it off, and go to another section of the frame and turn it on. Then turn it off. Get the picture? When your shutter finally closes, your photo will include several versions of you in various parts of the frame. Try this with a friend if your composition idea is more complex.
Tips for light painting indoors:
Use a mirror or reflective surface as a prop for your light painting photos. Make yourself the subject for a truly stunning self portrait project.
Alternatively, try using a light source that you can hover above a mirror, tilting your camera to catch the reflection and the original. Tie a light source to a string and dangle it, or try projecting light off of a reflective three-dimensional object for a final psychedelic image.
Check out these 10 light painting hacks using simple household objects to maximize creativity on indoor shoots!
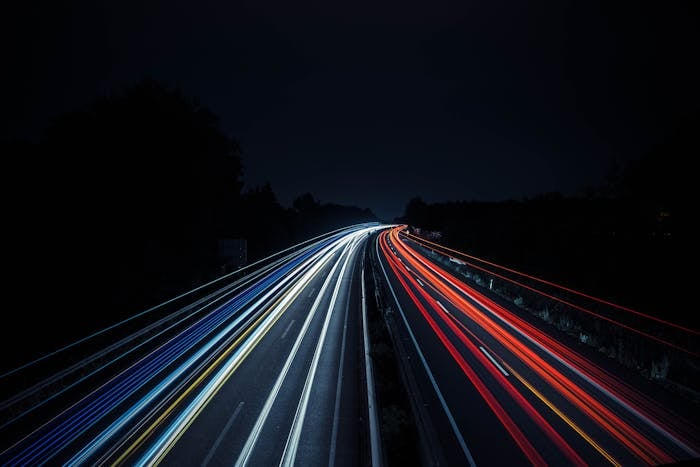
Night-time traffic is a great subject for outdoor light painting shots.
Photo by Marieke Schönfeld · View Photo
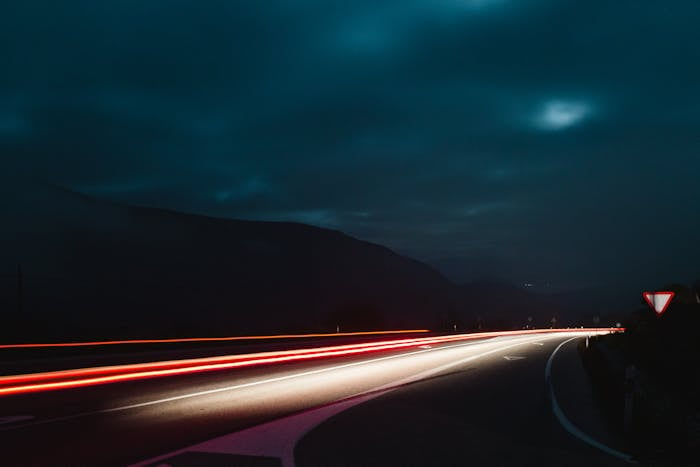
Car lights can produce amazing visual effects at night.
Photo by Juan Pablo Serrano · View Photo
Tips for light painting outdoors:
Try photographing light trails of cars at night! This super helpful guide walks you through the best vantage points and locations to experiment with. You’ll use the same principles of low ISO, long shutter speed, and high aperture as described above for photographing light trails. A tripod is definitely required for this technique.
When you’ve mastered photographing light trails of cars, try your hand at photographing star trails. You will be using bulb mode for this special night photography, keeping the shutter open for several minutes at a time.
The best results for star trail photos involve layering shorter exposures of four to five minutes taken over a 30 to 60 minute period together in post production, instead of leaving your shutter open for a single 30 or 60 minute exposure. This video tutorial details the tips and tricks you need to make every photo a knockout.
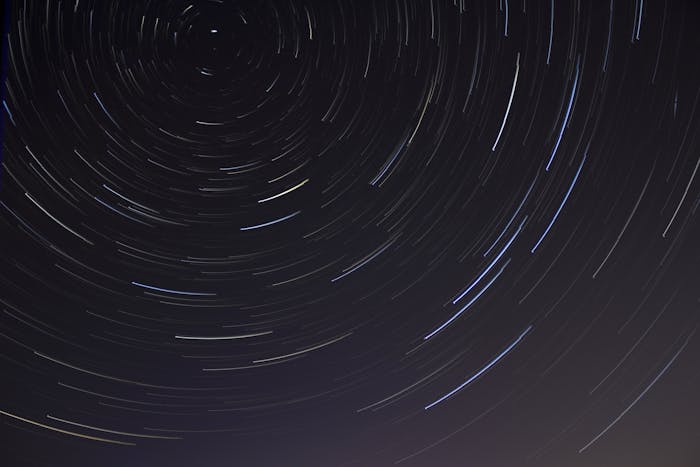
Create incredible abstract images by photographing star trails.
Photo by Jakub Novacek · View Photo
A few things to keep in mind when light painting:
Unless capturing lens flares are your intention, avoid shining the light source directly into the lens.
Avoid shining the light source in one spot for too long. This will cause the light to come up as “hot,” photo-speak for too bright.
Sound good? Get out there and play!
Cover photo by Rudolf Kirchner.
Written by Maggie Andresen · Apr 02
Maggie Andresen is a freelance documentary photojournalist and reporter based in Rwanda, covering East and Central Africa.