In our image-saturated world, photographers need more than just a signature shooting style. To stand out, you also need editing skills.
In 2020, we saw photographers around the world adapting to the pandemic and monetizing their unique editing talents by selling editing presets for Lightroom and other software online, making it easy for other photographers to achieve a distinctive look and aesthetic in minutes.
As more artists enter the scene and spark new trends, photo editing will continue to evolve and shift, with new and fresh ideas redefining the industry in 2021. Fortunately, photo editing software has matured rapidly in recent years, from the AI-powered tools that speed up your workflow to the creative mobile apps that make editing on the go a breeze.
Photo editing apps have never been easier to use, and they’ve also never been more important to developing your brand as a photographer. No matter what kind of camera you use, from iPhone to DSLR, editing is a crucial tool for every photographer to add to their skill toolbox.
This guide will cover all the basics of beginner photo editing, with a focus on Adobe Lightroom. Read on to learn how to take your photos to the next level in post.
Software and apps
There’s no shortage of options when it comes to editing apps, with major players like Adobe, ACD Systems International, PhaseOne, Serif, Skylum, DxO, and more rolling out smarter and more powerful tools with every passing year. From intelligent software like ACDSee Photo Studio Ultimate to affordable and easy-to-use apps like Affinity Photo, today’s photographers are spoiled for choice.
While Adobe Photoshop offers an array of fancy tools and capabilities for retouching, basic corrections and editing can be done in Adobe Photoshop Lightroom Classic—a go-to, all-rounder editing app for photographers of all levels, from beginners to established pros. It’s powerful software, but it’s also accessible. For that reason, most of our tips are targeted to Lightroom users, though you’ll find comparable tools and features in other apps as well.
If you’re using Lightroom, you’ll find all of the panels discussed here in the ‘Develop’ module.
Cropping and composition
The first step before getting into advanced edits will be cropping your photo. Lightroom has a number of grid overlays you can use to guide your composition; for example, you can use their guides to arrange your subject according to the rule of thirds or the golden ratio. You won’t always get it right in camera, so this is an easy fix you can do right after importing your image.
Other things to look out for are your horizon line and any vertical lines throughout your image, as you’ll want those to be even and straight. A quick fix would be to go to the ‘Transform’ tool and hit ‘Auto.’ In many cases, this step will correct basic composition issues such as a wonky horizon line. It’s not always enough, but it usually does the trick.

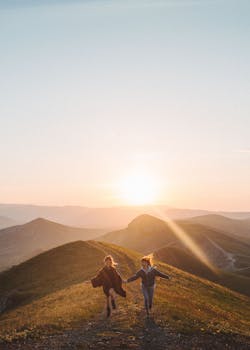
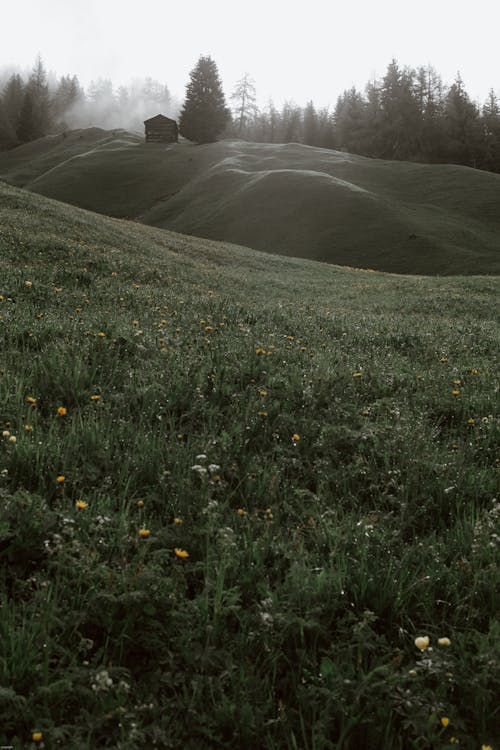
A lovely composition by Jess Vide, perfected in Lightroom.
Photo by Jess Loiterton · View Photo
Light and exposure
Once you’ve perfected your composition, you can just go right down into the Basic panel to make quick adjustments to your exposure. You don’t want to do anything drastic here, but you can bring your exposure up or down to fix an image that came out of the camera too dark or too light.
At the same time, you can tweak your contrast and adjust your highlights, shadows, whites, or blacks individually. Some photographers prefer not to have any clipping in the shadows or highlights, and others like to have areas of pure black and pure white. It’s all subjective. These are basic changes, but they can have a significant effect on your exposure and contrast.
The tone curve is where you can get more in-depth with editing your tones. Your highlights are on the right, and your shadows on the left. In many cases, creating a subtle ‘S’ curve will create some nice contrast and make your photo “pop,” though it’s up to you. You can edit all your tones in the RBG channel or go into your individual color channels, though doing the latter can result in extreme color changes if you’re not careful.
Eriks Abzinovs enhances this snap with a dreamy, yet still natural edit in Lightroom.
Photo by Eriks Abzinovs · View Photo
Color correction
Going back to the Basic panel, you’ll be able to adjust your white balance and color temperature sliders for natural, realistic color. To start, you can try an even quicker fix by grabbing your white balance dropper tool and clicking on an area of your photo that’s supposed to be a pure white or gray; in some cases, this will be enough to remove any color cast. To finesse further, go into your ‘Temp’ and ‘Tint’ sliders. You most likely want your colors to look true-to-life, so use a light touch here.
The HSL/Color panel is where you can tweak your colors further. If you know the basics of color theory, you know that color has three elements: hue describes where it falls on the color wheel (red, orange, yellow, green, etc.), while saturation describes its intensity. Finally, lightness is how light or dark a color is. Those three things can be adjusted in the Hue, Saturation, Luminance panel for more control over all your individual colors.

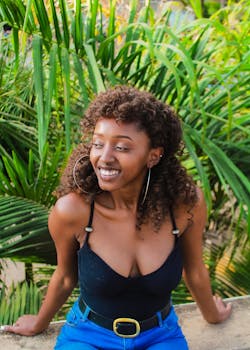
Karolina Grabowska creates a light and airy aesthetic for this still life, further enhanced in Lightroom.
Photo by Karolina Grabowska · View Photo
Retouching
Up until this point, every edit we’ve made will affect your entire image, but in many cases, you’ll want to adjust localized portions of your photo—whether that's an eye, a building, a tree, or something else. In that case, you can use your Brush tool to “paint” over the area you want to edit without affecting the rest of your image. This tool is perfect for tweaking color and lightness in specific areas.
You can also use the Graduated Filter instead of the brush tool to apply local effects across a gradient, perhaps in one corner of your image. The Radial Filter is another option if you’d prefer to edit a circular or rounded part of your image. Finally, you can use the Healing Brush tool to quickly retouch tiny spots in your photo, like a small blemish or dust spot.
Editing trends
Two of the most popular editing styles these days fall on two opposite ends of the spectrum: dark and moody versus light and airy. Both are evocative and magical when used correctly, and while you can always download presets to suit either aesthetic, they’re also pretty simple to create on your own in Lightroom.
Dark and moody edits
For a dark and moody edit, look for a photo with a mysterious vibe. Rich green outdoor scenes tend to work especially well. As you might expect, the first step in Lightroom will be to pull down your exposure and your highlights, while pushing up your shadows for more detail. You can also push the contrast up a bit, while pulling your blacks way down.
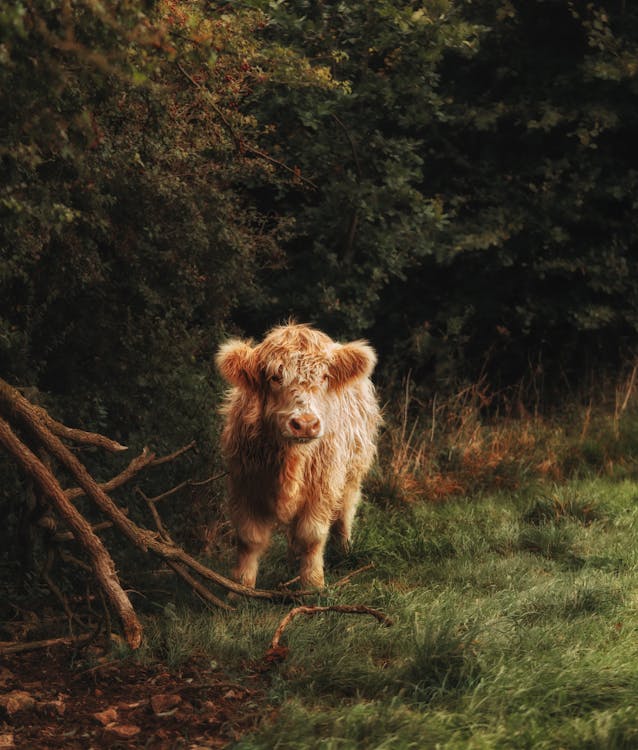
Ryan Leeper achieves a creative, super-shadowy dark and moody edit.
Photo by Ryan Leeper · View Photo
In the tone curve, you can then create that faded, matte black look by lifting those shadows in the bottom left-hand corner of your curve. In the HSL/Color panel, you’ll desaturate your greens for that moody, fairytale look. Some photographers will then add a subtle vignetting effect. Of course, remember to tailor your adjustments to the image, as there’s no one-size-fits-all solution here.
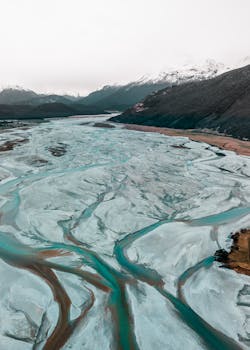
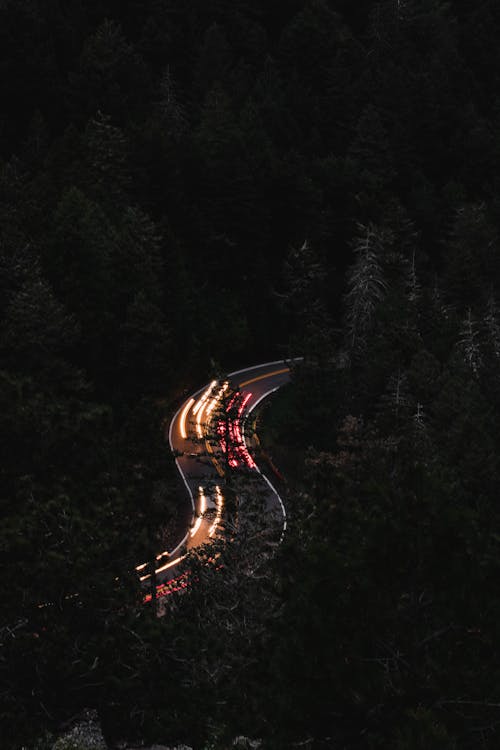
Eberhard Grossgasteiger creates a subtle and evocative mood in post-processing.
Photo by eberhard grossgasteiger · View Photo
Light and airy edits
For a light and airy edit, you’ll want to start with a photo with soft, even light and a light-colored background. This is a particularly popular style among wedding and food photographers. The challenge is getting that bright vibe without blowing out all your highlights.
To start, you’ll want to make sure your white balance is on-point and your whites appear as true white. If you’d like, you can then bring up your exposure a tad, but use a light touch. You can also bring down your highlights a bit and lift your shadows. Next, in the tone curve, you can edit your shadows, highlights, and mid-tones further for that airy look.
Some photographers then like to tweak the saturation and luminance of some colors to taste during a light and airy edit. Another trick would be to head over to Lens Corrections and check ‘Enable Profile Corrections’. This step will get rid of any vignetting and instantly brighten the image. These changes are all subjective, so play around with the sliders to see what works. A little goes a long way.
Cover photo by Josh Hild.